


Muddy Mustang
Taking on Houdini for the first time, this project centers around working in a pre-established pipeline from a Technical Director. By using and learning
their tools, the task was to create a car animation that is sliding through mud in a forest - where creativity lies in animation, lighting, rigging, compositing.


USD Workflow and Car Import
Starting everything off with the model, I learned how to apply textures in Karma to a pre-existing model using TD's procedural setups. I was tasked to create variants and apply a light-on and light-off variation which is the highlight of USD workflows.
Custom Numbers and Colors creating 3 material variants - Green, Red, and Blue

The reason why this workflow is so powerful is because by creating variants early on, using USDs and variants, it is very easy to swap out already animated, textured, even warped elements. By calling to a different variant, you can change textures, add light, or even add additional objects

Houdini's Car Rig
This part of the process is probably the most important because it required me to set-up the new car rig in Houdini which was very intuitive for something that seems very complicated. The correct setup of this rig allows for all the animation control which in this kind of a rig is literally like driving a car!

Keyframing these four was the main driving force (no pun intended)


Animation Preroll + the final drift, all controlled by the 4 keyframes
Tiny changes = huge differences


Mud Simulation
After finding the optimal movement for the car, and the animation is locked in, it was important to choose the exact camera angle for the final shot since
the simulation part is very heavy on computing power, and the optimization method for the simulation is cutting down the simulation only to visible region.

Tracing the car's trail to only connect that geometry to the simulation later on
An important talking point here is that it can get easily overwhelming to work within tools provided by other people.
Even though this part of the process was mainly just following instructions, it was still important to import things correctly, cache everything, monitor performance issues, troubleshoot within the tool, and to deliver everything for the next department/part of the process.


Before
After
After using simple HDRI lighting, rendering out with AOVS basically gave me a raw version of the animation. Using Nuke, I added some nice bloom and depth of field. Matching the color space from Houdini to Nuke was also important so that the final output has the correct colors

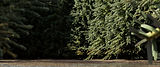


Another good reason for using a USD workflow - it is very easy to scatter different trees if the USD has variants.
And if you want more variants you can just replace the current USD with one that has more variants, everyting else automatically updates.


Scene Building / Lighting / Rendering
The final part includes filling up the scene, lighting it nicely, rendering, and touching it up in Nuke. As the scene revolves around a muddy ground, it only made sense to have a forest environment. By using some simple scattering techniques in Houdini and a good tree USD pack, I cut down the environment to the camera's view again.
